Table of Content:
- Google Analytics Setup
- Benefits of Google Analytics
- Introduction of Google Analytics 4
- How does GA4 Work?
- Google Analytics 4 vs Universal
- How to create GA4 Property?
- Upgrade Google Analytics 4 from Universal
- Add GA4 tracking code to a website without GTM
Google Analytics is an analytical and reporting tool for SEO experts and online marketers. Google offers this service for free to anyone that has a Google Account. But, it’s only helpful for those who have their website. Google Analytics helps in tracking a website’s performance and collecting website insights.
Marketers can use Google Analytics to understand the source of traffic, understand how the marketing campaigns are performing, and more. All in all, Google Analytics helps in getting access to every possible insight about a website.
In this article, we’ll be sharing all the necessary information about Google Analytics and the latest update on Google Analytics 4.
Why Use Google Analytics?
Google Analytics collects user data from every visitor that comes onto the website. Google Analytics works by adding a javascript tag to the code of every page. The tag runs in every web browser, it collects data and shares it with Google’s servers.
Using this data, Google Analytics creates custom reports that help in understanding data a bit better. The custom reports include a series of data, such as:
- Number of users
- Bounce rates
- Average session durations
- Sessions by channel
- Page views
- Goal completion, and more.
How to Set up Google Analytics 4?
Now coming back to how to use Google analytics:
- First, you’ll need to sign up for a Google account. To do so, you need to visit Google.com/analytics.
- Tap on the sign-in button or create an account button on the left corner. Provide the needed information and then click on Get Tracking ID to complete the process.
If you don’t know how to set up Google Analytics on your website, then the process is pretty simple. To set up Google Analytics on your device, you need a script or a tracking code. Through that code, you’ll be taken straight to the Tracking Code section after you finish setting up your account.
You need to add a tracking code on every page of the website you want to track. You can do this in multiple ways:
- Copy and paste the code straight to the website template.
- Create an “analyticstracking.php” file with your code and add <?php include_once(“analyticstracking.php”) ?> after your template’s <body> tag.
- Go to your website hosting provider, website builder tool, or blog platform for Google Analytics integration. Most will offer plug-ins to integrate analytics into your website. Website builders such as Blogger and Squarespace just need your Google Analytics web property ID or account number.
Benefits of Google Analytics 4
Google Analytics is highly useful for websites as it provides much-needed insights. Without proper analytics, and reporting website owners can’t know what is working and what isn’t. Here are all the benefits of using Google Analytics:
- Track user traffic
- Helps in understanding user behavior
- Offline to online tracking
- Data reporting and customization
- Helps in improving marketing campaigns based on powerful marketing analytics tools
- Improve SEO and Content Marketing with Analytics
- It Helps website owners understand and find an ideal target audience
- Google Analytics cost
- Easy to set up and get website insights
- Provides new ideas for business
- eCommerce performance tracking
What is Google Analytics 4?
If you don’t know it already, then Google Analytics Universal (the traditional version of Google Analytics) will stop processing new data on July 1, 2023. From July 1, Google Analytics 4 or GA4 will be the only Google tool available to track website activity.
Google Analytics 4 is built to provide more data throughout the user lifecycle. This simply means that more and more data is available after you acquire a new customer. This data includes the level of engagement, monetization, and customer retention.
Previously, Google Analytics 4 was known as “App+Web” and its beta version came out in October 2022. This new version was set in place due to new changes in online policies and recent customer behavior changes. These sudden changes led to the birth of Google Analytics 4 as the Universal version just couldn’t provide a complete view of customer journey data.
How Does Google Analytics 4 Work?
To solve the issue of a limited view of customer data, Google came out with GA4. At its core, Google Analytics offers a machine learning-based approach to cross-platform insights and a privacy-focused approach.
According to information put out by Google “It has machine learning at its core to surface helpful insights automatically and gives you a complete understanding of your customers across devices and platforms. It’s privacy-centric by design, so you can rely on Analytics even as industry changes like restrictions on cookies and identifiers create gaps in your data.”
While there are other AI-based insight tools in the industries, Google Analytics 4 provides a better view of the information.
Difference Between Google Analytics 4 vs Universal Analytics
If you’re looking for a reason to switch to Google Analytics 4, then here are several of them.
- Deeper Integration with Google Ads
One of the biggest changes brought forth with the introduction of GA4 is a tool that measures app and web integrations.
Moreover, this particular integration allows you to check in app and web information for Google Ads, YouTube Ads, non-Google advertisement channels such as Facebook, and organic channels such as social, and email.
The integration allows you to better understand the impact of the amount you’ve spent on paid ads.
- Customer-Focused Analytics
Google Analytics 4 provides a more customer-centric approach to keeping track of the customer’s journey. More than often, it contains multiple devices and platforms. This helps users understand where the customers are coming from, and what actions are they taking when they land on the website.
- Better Reporting
When it comes to reporting, Google Analytics 4 offers better and more simplified reports to track customers. The newly added “Life Cycle” section includes reporting for:
- Acquisition
- Engagement
- Monetization
- Retention
Google Analytics previously only offered reports on customer acquisition, so the new sections provide much better insights.
- Better Data Controls
Google Analytics 4 is designed to keep up with changes in the new privacy landscape. It provides more controls on
- Data collection
- Data analysis
- Customer retention data
The new Google Analytics platform will use more data modeling to provide better insights into customer journeys.
How to Create New Google Analytics Account and GA4 Property?
If your website is completely new and you don’t have an analytics account, you’ll need to make one. when you start building an account, Google will start building Google Analytics 4 for the website. As Google Universal is about to shut down in a couple of months, Google wants users to familiarize themselves with the GA4.
Here’s the step-by-step breakdown of how to create a new Google Analytics Account, and set up GA4 Property.
- Login to your Google account and visit the Google Analytics website.
- Click on the “Start Measuring” button.
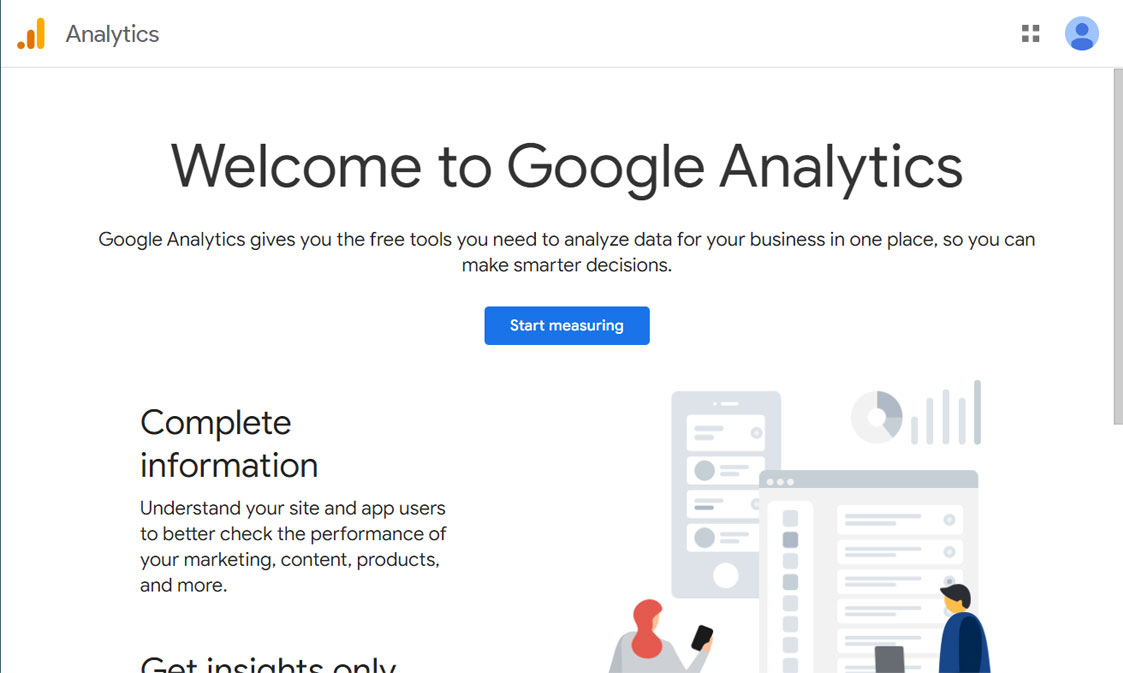
- Add the name of your account. Usually, it’s the name of your business. Once, you’ve added the name, click on the “Next” button.
- Add your website name (Property Name) and add information in the fields named “Reporting Time Zone” and “Currency”.
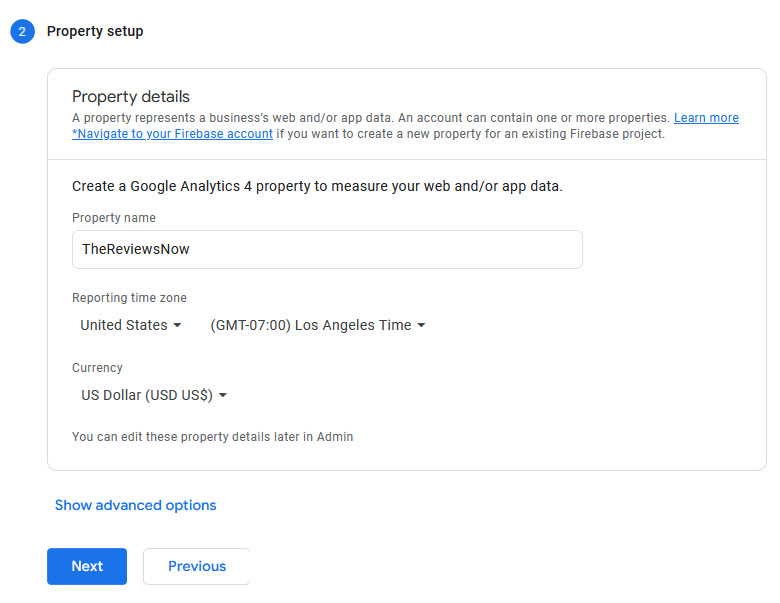
5. To set up a Universal Analytics property alongside the GA4 Analytics property, go to “Show Advanced Options.”
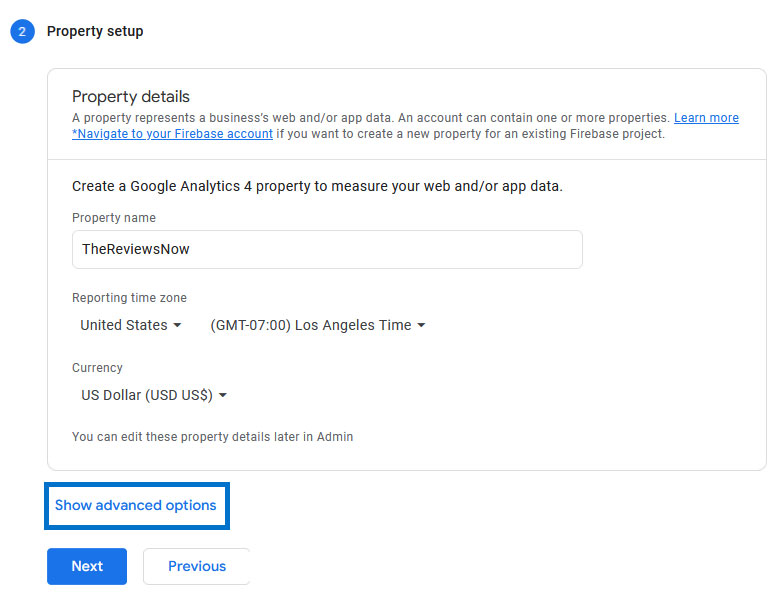
- Once you click on it, you’ll see a button that’s turned off. Turn on the toggle. Watch the image below for reference.

- In this step, add your website URL in the respective field, and click on the option to create either GA4 and Universal or just set up Google Analytics Universal. Once, you’ve updated the information, click on the “Next” button.
- Add the required details about your business by clicking on the categories that your business falls in. You’ll be asked industry of your business, your business size, and what’s your purpose for using Google Analytics for your business.
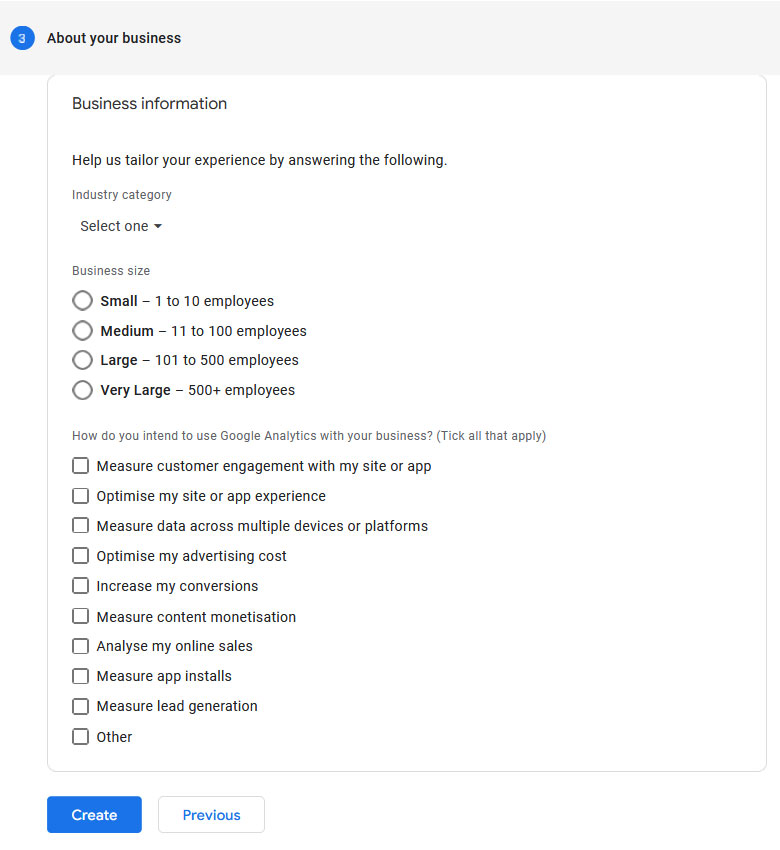
Now that you’ve added all information, you need to click on the “Create” button at the bottom of the screen.
- Click on the checkmark to accept Google’s terms and conditions for Data Processing and Measurement Controller-Controller Data Protection Terms of the data.
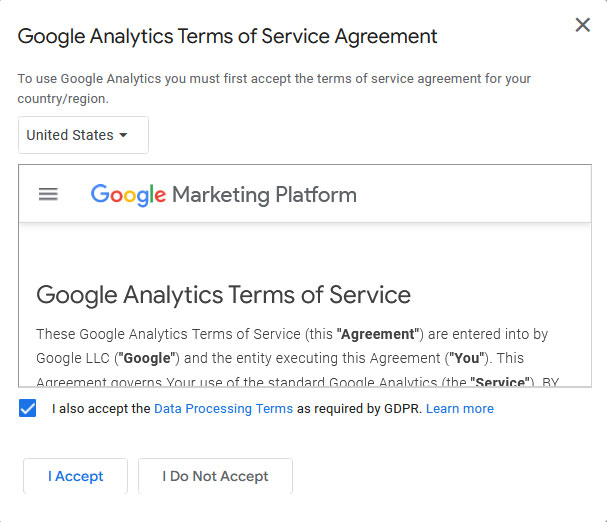
At the bottom of your screen, you’ll see the “I Accept” button, click on it.
- Once you accept the terms, you’ll land on the “Web Stream Details” page, in this page, you’ll be able to find the Measurement ID. You’ll have to add this ID to your website to start tracking the performance of your website.
If you’ve followed all these steps, then congratulations, you’ve now made your GA4 and Google Analytics Universal accounts.
Steps to Migrate to Google Analytics 4 from Google Analytics Universal
Let’s say you have already set up Google Analytics Universal, and you want to set up Google Analytics 4, what will you do? Well, all you have to do is follow these steps.
- Click on “Admin” in your Google Universal Property.
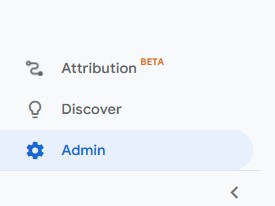
- Under the property section, click on “GA4 Setup Assistant”.
- You’ll now be redirected to the “Google Analytics 4 Property Setup Assistant” page. Click on the “Get Started” button. It would look something like this.
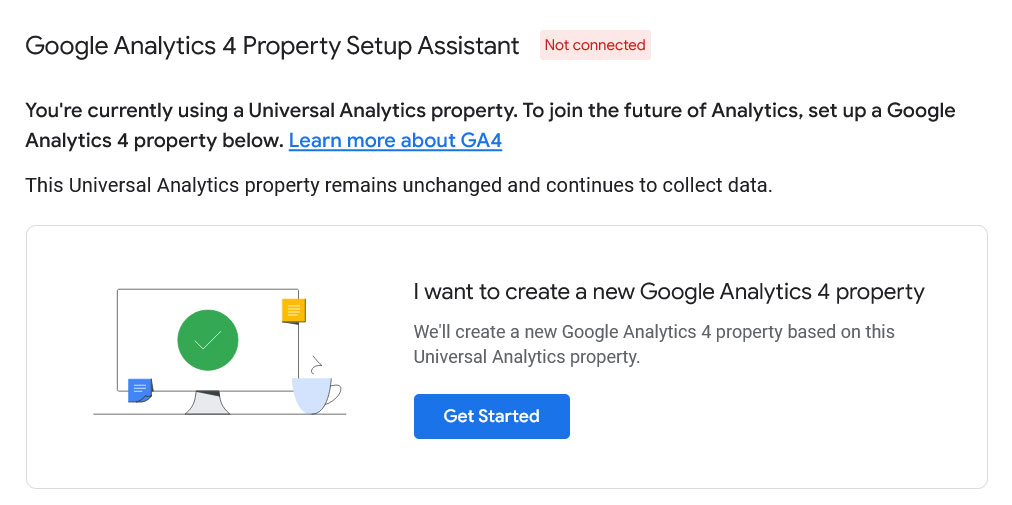
- As soon as you click on the “Get Started” button, a pop-up will open on your screen. On this popup, click on “Create Property.”
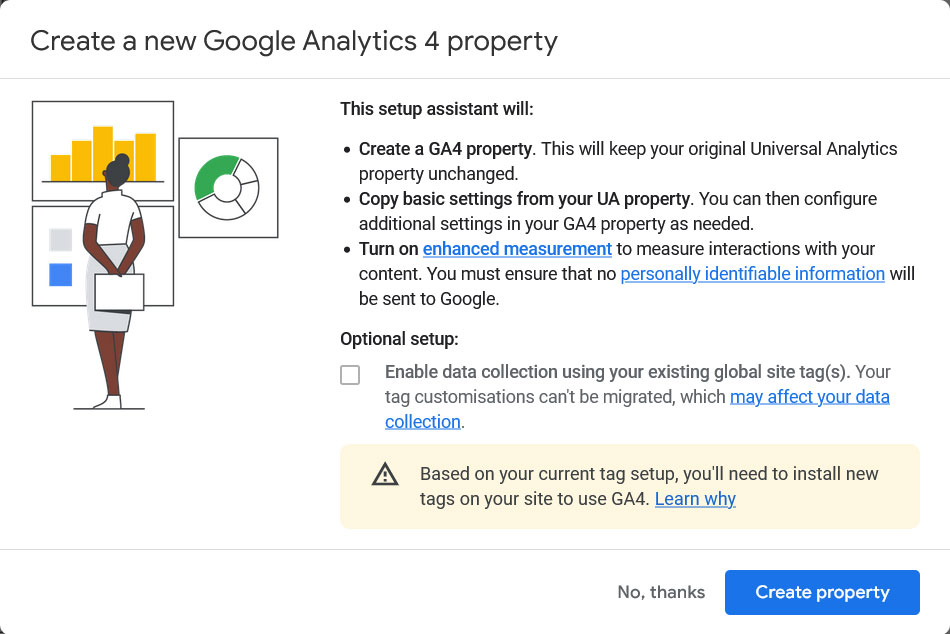
- After that, you’ll be taken to a new page where you can see the connected property message with the property ID.
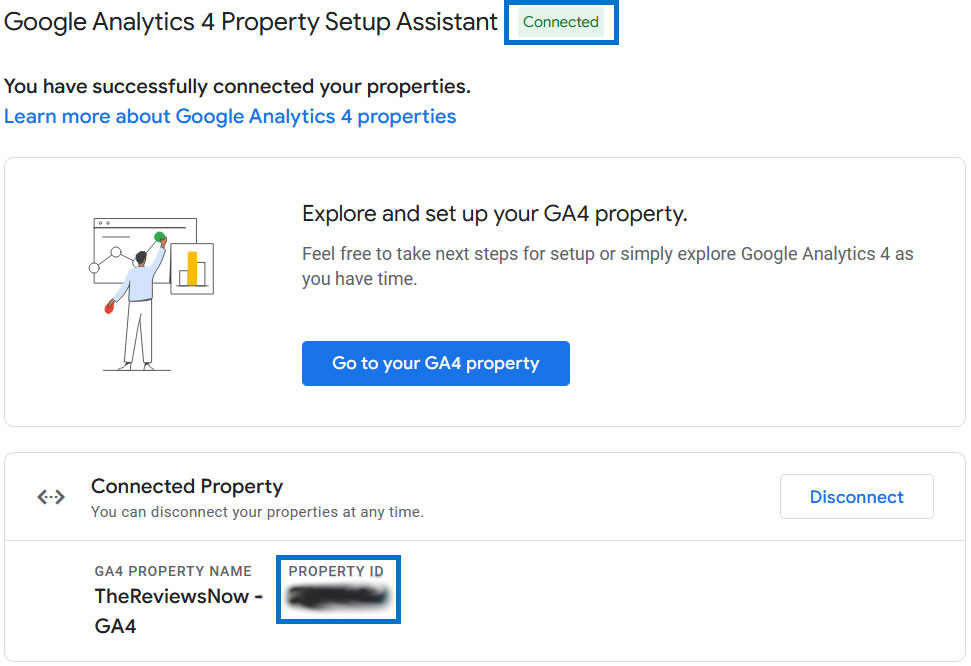
Now, click on “See your GA4 Property” which will lead you to the “Setup Assistant” screen. Click on “Data Streams” page.

- When you’re in the “Data Stream” section, again click on the (>) on the right bottom of your screen. You’ll land on the “Web Stream Details” page.

- On the “Web Stream Details” page, go to the “Measurement ID” for GA4. You’ll find this property in the top right corner.

That’s all it takes to upgrade your Google Analytics Universal to Google Analytics 4.
Steps to Add GA4 Tracking Code to the Website Without Google Tag Manager
Basically, there are 3 ways you add the GA4 tracking code to your website if you don’t want to use the Google Tag Manager. These options include:
- Connect Measurement ID to existing Universal Analytics account via Universal Analytics.
- Add a new “Config” directive in your existing code.
- Copy and paste the GA4 tracking code script inside the <head> tag.
Connect Measurement ID to Existing Universal Analytics
It’s easy to add the measurement ID to your website if you have an existing universal account. You need to connect the GA4 Measurement ID under the Universal Analytics Property. You need to add the code under “Tracking Info” under the property section. Here’s the step-by-step breakdown of the steps so you can add the tracking code.
- Click on the “Admin” section on your Universal Analytics Property.

- Click on “Data Streams” and then go to “Web.” Click on the (>) arrow under “Data Stream” and you’ll go to the “Web Stream Details” page.

- Your GA4 Measurement ID is in the top right corner of the screen, find it and copy it.

- Open your Universal Analytics Property, go to Admin, then go to Tracking Info, and then go to Tracking Code.
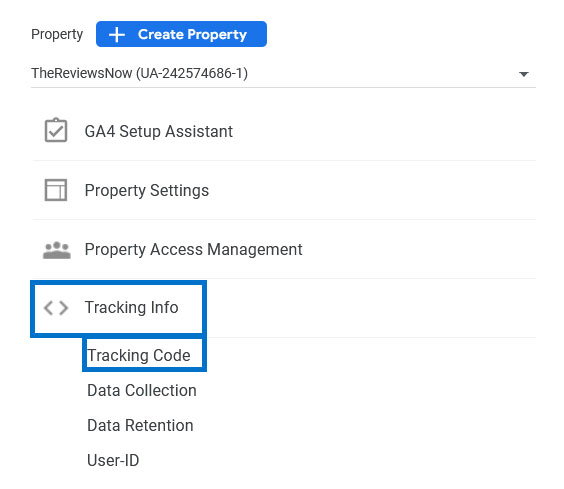
- Once the new page opens, scroll down to find the “Connected Site Tags” option, and click on this option.

- Paste the Measurement ID that you’ve copied to build a new site tag.
- Click on “Connect”, and your Universal Analytics Property and GA4 Properties are connected.
Add a New “Config” Directive in Website Existing Code
In case there’s already a (gtag.js) code on your website, then you can add your GA4 Measurement ID in the same code. All you have to do is add a new “config” directive to the existing analytics code.
Google.com/analytics:
<!– Global site tag (gtag.js) – Google Analytics –>
<script async src=”https://www.googletagmanager.com/gtag/js?id=UA-xxxxxxxxx-1″></script>
<script>
window.dataLayer = window.dataLayer || [];
function gtag(){dataLayer.push(arguments);}
gtag(‘js’, new Date());
gtag(‘config’, ‘UA-Property ID’);
</script>
After “gtag(‘config’, ‘UA-Property ID’);“, add a new “confg” directive to add your GA4 Measurement ID. Here’s the code for your reference:
<!– Global site tag (gtag.js) – Google Analytics –>
<script async src=”https://www.googletagmanager.com/gtag/js?id=UA-xxxxxxxxx-1″></script>
<script>
window.dataLayer = window.dataLayer || [];
function gtag(){dataLayer.push(arguments);}
gtag(‘js’, new Date());
gtag(‘config’, ‘UA-Property ID’);
gtag(‘config’, ‘G-Propert ID’);
</script>
Copy and Paste GA4 Measurement ID in the <head> Tag
The last option to add the GA4 tracking code to your website is by adding the code directly to the website source code. Here are the steps to do so:
- Click the “Admin” option located in the left bottom corner,
- Follow the same steps as above to copy the Measurement ID.
- Copy and paste this code into this <head> of every web page you want to track.
Final Word: Google Analytics Universal and Google Analytics 4
All in all, Google Analytics 4 is designed to help businesses and marketers in getting better control over their data. It provides more customer data compared to Google Analytics Universal. Combining that with machine learning and data science analysis, it is a far better solution than the legacy version.
As the legacy version of Google Analytics is available till July 1, 2023, you have a lot of time on your hand to migrate and understand everything GA4 has to offer.
If you still have any questions or concerns regarding the setup process, you can reach out to Google Answers. While it’s not easy setting up Google Analytics 4, you can do it if you follow all the steps carefully.

